


Now that I am engaged to be married in May, I've throw myself headfirst into craft blogs, tutorials, and pouring over websites filled with creative and unique ideas.
First and foremost I wanted my wedding to reflect my and Adam's personality and tastes, and I wanted (and needed) to do it on a tight just-gratuated-from-college budget. I also wanted the decorations to be something that wouldn't just be used that day, but something we could bring into our first home together and use as decor and as a reminder of that special day.
I graduated college with a degree in Graphic Design, so it was already pretty much a given that I would be designing my own invitations and save-the-dates. They honestly were the easy part. In fact, I think the save-the-dates were done before the proposal even happened...

Despite
my typical knack for crafts and ingenuity, getting started from scratch on a
crafted wedding was more difficult than I thought it would be. I spent the
first month seeing so many awesome ideas that I wanted to do them all and had a
hard time focusing my efforts on any one project. Once I got my craft ADD
period out of the way and settled on a theme and a color palette, I buckled
down on my first big project. For this I made the decision not to use any
flowers in the wedding or reception. In part because I thought I could
save some money this way, but also because my mom has always had her wedding
bouquet sitting on her dresser (fake flowers, of course) and I loved the idea
that it was always out and visible. I don't typically like the look of fake
flowers so I looked for all sorts of alternatives, but in the end I decided I
still wanted it to resemble flowers, so I settled on buying 2 large spools of
ribbon from B. B. Crafts and using this tutorial to make ribbon roses. This
would be easy enough, right??? I'm good with a needle and thread, how hard
could it be? Many painstaking hours, a misdiagnosed pinched nerve in my neck,
and a few color changes later, I finally had enough ribbon roses to make up my
bouquet and some bridesmaid bouquets.
Tadaaa!
Tadaaa!

Let's review the process, shall we?
I used: 2 colors of ribbon, matching thread, needles, ruler, floral wire, floral tape, scissors, pinking shears, a lighter, wire cutters, elastic, tulle, and a whole lot of patience. Eventually I used watered down paint and dip-dyed half the roses to give them varying shades of purple and red as well, but that's entirely optional.
I used: 2 colors of ribbon, matching thread, needles, ruler, floral wire, floral tape, scissors, pinking shears, a lighter, wire cutters, elastic, tulle, and a whole lot of patience. Eventually I used watered down paint and dip-dyed half the roses to give them varying shades of purple and red as well, but that's entirely optional.

And here is what I got!
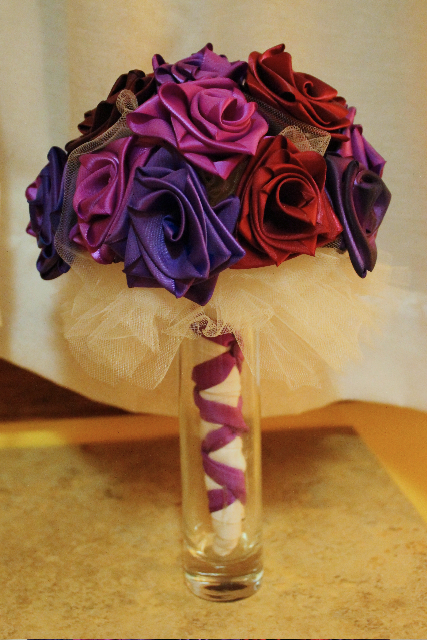


I love how it turned out, but more than that, I love the fact that it's something I made with my own two hands and that I can have sitting out for many years to come. It was definitely a labor, but it was a labor of love, and I had a lot of fun creating it.
166 Days til the wedding... Yeah, I still have time for more crafting.
....................................
Thank you, Kendall! I don't typically like how fake flowers look either, but yours are so pretty! I am impressed and I'm excited to see what else you're crafting for your wedding!
- From the desk of Mrs. M
Those flowers are beautiful! I would have never had the patience for something like that. What a wonderful thing you will be able to keep for years!
ReplyDelete